How to Organize Your Pantry Like a Pro: Chef Abdul’s Guide to a Tidy and Functional Pantry

An organized pantry is the secret to a stress-free cooking experience. It saves time, reduces food waste, and inspires creativity in the kitchen. Chef Abdul shares expert tips and strategies for organizing your pantry like a pro, ensuring it stays neat, accessible, and efficient.

Step 1: Assess and Declutter

Start by emptying your pantry and evaluating what you have.

  1. Remove Everything: Remove all items from the pantry to get a clear view.
  2. Check Expiration Dates: Discard expired or stale products.
  3. Group Similar Items: Create categories such as grains, canned goods, spices, and snacks.
  4. Clean the Space: Wipe down shelves and vacuum or sweep the pantry floor.

Step 2: Categorize and Group Items

Organize items into logical categories to streamline cooking and shopping.

  • Grains and Pasta: Rice, quinoa, oats, pasta.
  • Baking Supplies: Flour, sugar, baking powder, chocolate chips.
  • Canned Goods: Beans, tomatoes, coconut milk, soups.
  • Snacks: Nuts, crackers, granola bars.
  • Spices and Seasonings: Salt, pepper, dried herbs, spice blends.
  • Condiments: Vinegars, oils, sauces.

Pro Tip: Use clear containers or bins to group similar items, making them easy to access and restock.

Step 3: Use Storage Containers

Invest in high-quality storage solutions for a clean, cohesive look and longer shelf life.

  1. Airtight Containers: Keep grains, pasta, and baking supplies fresh and pest-free.
  2. Clear Jars: Use for frequently used items like flour, sugar, or coffee for easy visibility.
  3. Baskets or Bins: Ideal for corralling smaller items like snacks, packets, or tea bags.
  4. Lazy Susans: Perfect for oils, vinegars, and condiments to maximize corner space.
  5. Labels: Clearly label containers and bins to maintain organization.

Pro Tip: Use stackable containers to save space and create a uniform look.

Step 4: Maximize Space

Optimize every inch of your pantry, no matter its size.

  • Adjustable Shelves: Customize shelf heights to fit taller items or stack bins.
  • Door Storage: Install racks or hooks inside the pantry doors for spices, wraps, or aprons.
  • Under-Shelf Baskets: Utilize the space beneath shelves for lightweight items like bread.
  • Tiered Shelves: Arrange canned goods or spices on tiered racks for better visibility.

Pro Tip: Use the top shelves for rarely used items and keep everyday essentials at eye level.

Step 5: Create an Inventory System

Know what you have to avoid overbuying and wasting food.

  1. Track Stock: List staple items and their quantities.
  2. Rotate Items: Use the “first in, first out” method to ensure older items are used before newer ones.
  3. Restock Regularly: Make a habit of replenishing low-stock items during grocery shopping.

Pro Tip: Use a small whiteboard or notepad in the pantry to jot down items to buy.

Step 6: Keep It Tidy

Maintain your pantry’s organization with regular upkeep.

  1. Weekly Check: Quickly scan for misplaced items or spills.
  2. Monthly Deep Clean: Remove items, wipe down shelves, and reorganize if needed.
  3. Teach Your Household: Encourage family members to return items to their designated spots.

Pro Tip: Dedicate 10 minutes each week to tidy up—it prevents major overhauls later.

Chef Abdul’s Pantry Must-Haves

Stock your pantry with essentials to make meal prep a breeze.

Staples

  • Grains: Rice, quinoa, couscous, oats.
  • Pasta: Spaghetti, penne, gluten-free options.
  • Legumes: Lentils, chickpeas, black beans.
  • Canned Goods: Tomatoes, coconut milk, broth.

Spices and Seasonings

  • Basics: Salt, pepper, paprika, cumin.
  • Blends: Garam masala, Italian seasoning, taco mix.
  • Extras: Bay leaves, cinnamon sticks, star anise.

Baking Essentials

  • Flours: All-purpose, whole wheat, almond flour.
  • Sugars: Granulated, brown, powdered.
  • Leavening Agents: Baking powder, baking soda, yeast.

Oils and Vinegars

  • Oils: Olive oil, avocado oil, sesame oil.
  • Vinegars: Balsamic, apple cider, rice vinegar.

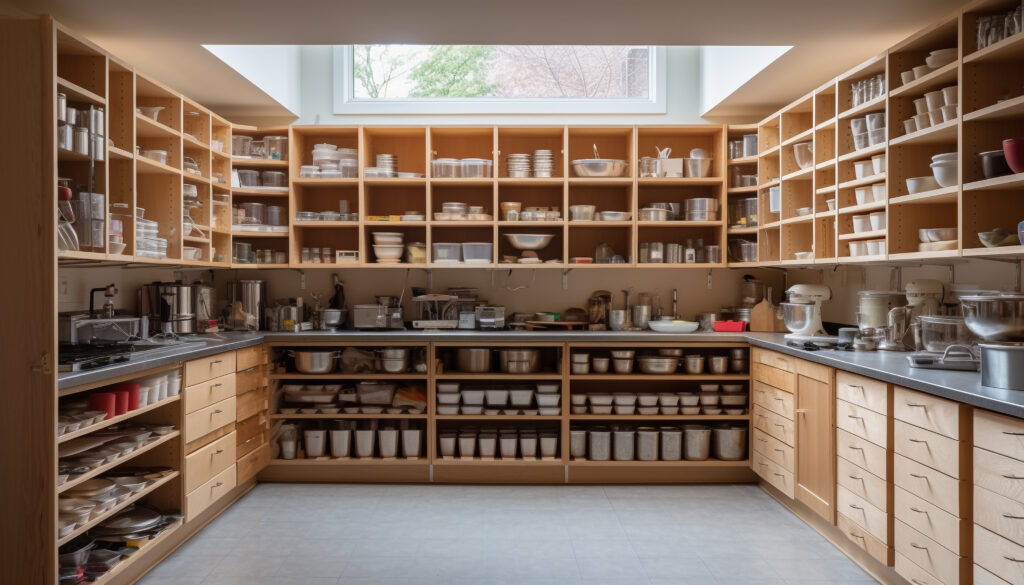
Sample Pantry Organization Layout

  1. Top Shelf: Rarely used appliances or bulk items (e.g., slow cooker, large bags of rice).
  2. Eye-Level Shelf: Frequently used items like grains, spices, and oils.
  3. Lower Shelf: Heavy items like canned goods and jars.
  4. Floor Area: Oversized items like water bottles, flour sacks, or bins for potatoes and onions.

Final Thoughts

An organised pantry simplifies cooking, reduces stress, and always prepares you for any recipe. With Chef Abdul’s tips, you can transform your pantry into a well-oiled machine that inspires creativity and saves time.

Share